Installation & Setup
This guide covers system requirements, platform-specific installation, permissions, and initial configuration to get Rephlo up and running on Windows, macOS, or Linux.
System Requirements
| Requirement | Windows | macOS |
|---|---|---|
| OS Version | Windows 10+ (64-bit) | macOS 10.15 Catalina+ |
| Architecture | x64 | Apple Silicon (arm64) or Intel (x64) |
| Framework | .NET 10 Runtime (bundled) | .NET 10 Runtime (bundled) |
| RAM (Cloud) | 4 GB minimum | 4 GB minimum |
| RAM (On-Device / Ollama) | 16 GB+ recommended | 16 GB+ recommended |
| GPU (On-Device / Ollama) | NVIDIA 8 GB+ VRAM | Apple Silicon unified memory |
Linux: Coming soon. Currently, Rephlo is available for Windows and macOS only. Check https://rephlo.app/download for updates.
Note: The .NET 10 runtime is bundled with the self-contained release packages. You do not need to install it separately.
Installation by Platform
Windows
- Download the latest
Rephlo-win-x64.zip(or.exeinstaller) from https://rephlo.app/download. - Extract the ZIP to a permanent location (e.g.,
C:\Program Files\Rephloor%LOCALAPPDATA%\Rephlo), or run the installer. - Launch by double-clicking
Rephlo.exe.
Windows SmartScreen: On the first run, Windows may show a SmartScreen warning because the application is not signed with an EV certificate. Click "More info" then "Run anyway" to proceed. This prompt only appears once.
On Windows, Rephlo stores its data in %APPDATA%\Rephlo\, with the SQLite database at %APPDATA%\Rephlo\rephlo.db.
macOS
- Download the latest
Rephlo-macos.dmg(orRephlo-macos.zip) from https://rephlo.app/download. - Install by dragging
Rephlo.appto your/Applicationsfolder. - First launch: macOS Gatekeeper may block the app. Right-click
Rephlo.appand select "Open", then click "Open" again in the confirmation dialog. - Grant permissions: Rephlo shows a permissions dialog on first launch (see the macOS Permission Setup section below).
On macOS, Rephlo stores its data in ~/Library/Application Support/Rephlo/, with the SQLite database at ~/Library/Application Support/Rephlo/rephlo.db.
Important: Rephlo must run as a
.appbundle on macOS. Running viadotnet runfrom the terminal will not allow global hotkeys to function because macOS requires Accessibility permission to be granted to a signed.appbinary.
Linux
Coming Soon: Rephlo for Linux is currently under development and will be available soon. Check back at https://rephlo.app/download for updates.
Windows and macOS are fully supported. If you're interested in Linux support, please stay tuned for announcements.
macOS Permission Setup
macOS requires explicit user consent for apps that detect keyboard shortcuts (global hotkeys) and capture the screen. Rephlo needs two permissions to function fully:
| Permission | Purpose | What Breaks Without It |
|---|---|---|
| Accessibility | Read your selected text, detect keyboard shortcuts, and paste AI results back into any application | Hotkeys do not trigger; overlay never appears; results cannot be inserted |
| Screen Recording | Capture screenshots for AI-powered visual analysis | Screenshot commands fail |
Step-by-Step Permission Grant
On first launch, Rephlo automatically displays the "Rephlo needs your permission" dialog. It explains: "Rephlo needs these permissions to detect text selections and capture screenshots. Your data stays on your device."
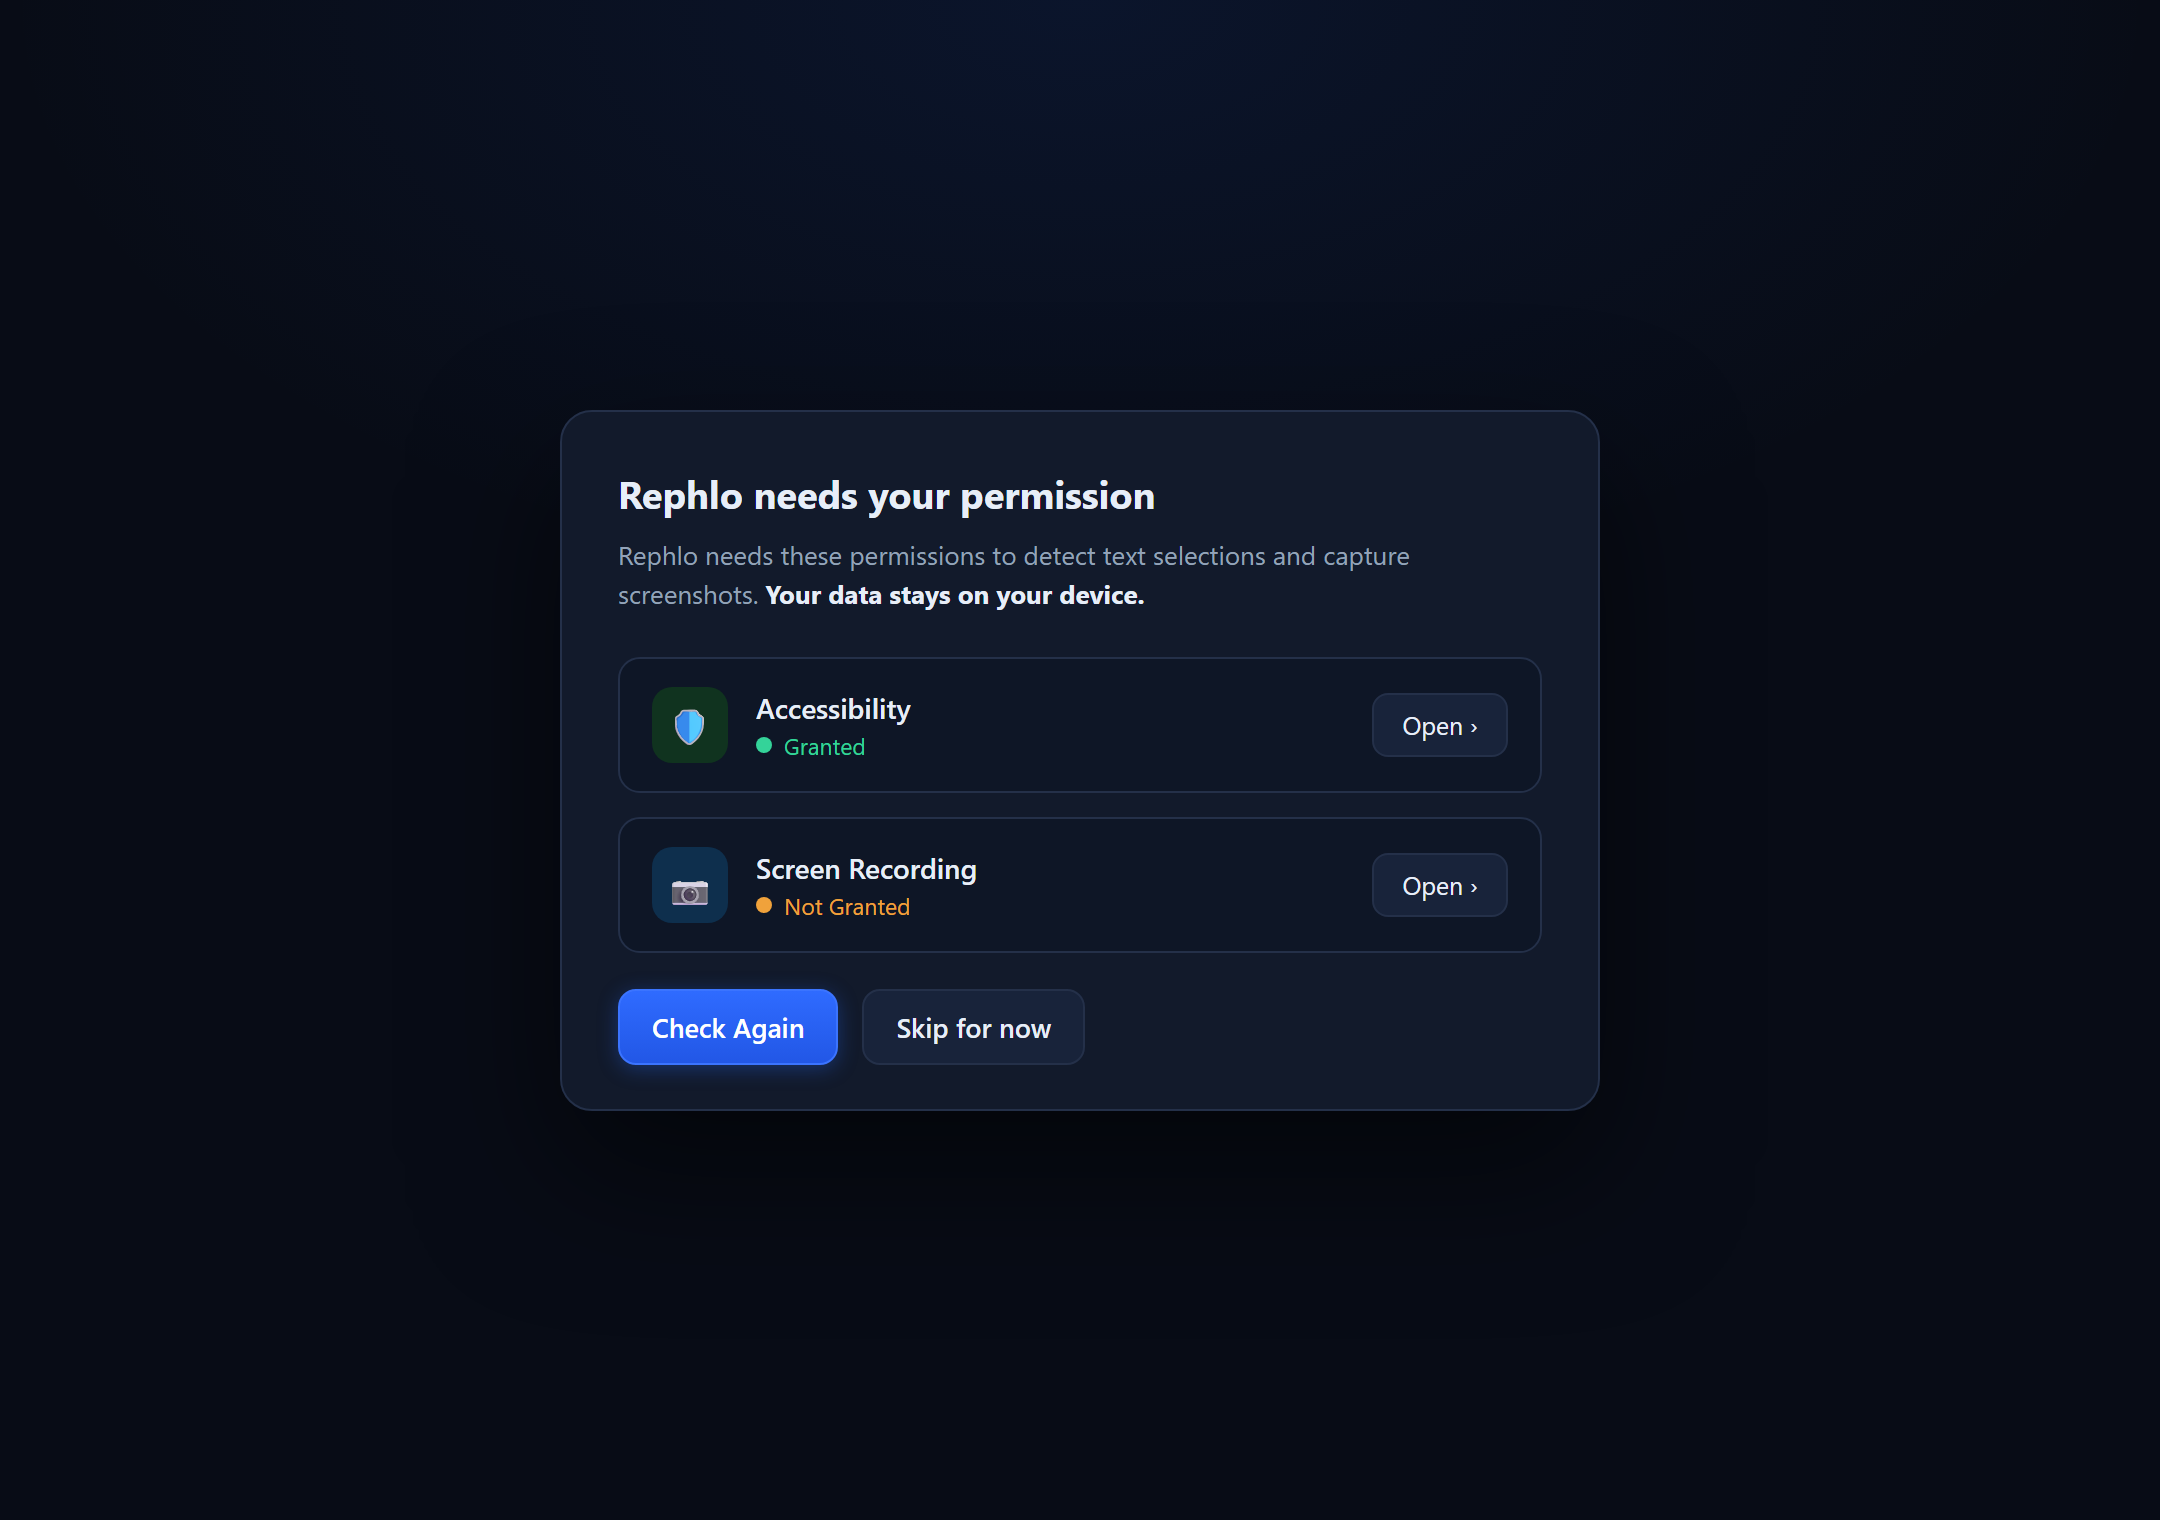
The permissions dialog shows two rows—Accessibility (with a shield icon) and Screen Recording (with a camera icon)—each displaying a status of Granted or Not Granted and an "Open ›" button that jumps to the matching macOS settings pane. Two actions sit at the bottom: Check Again (primary) and Skip for now.
Follow these steps:
-
Accessibility Permission a. Click "Open ›" next to Accessibility. b. macOS opens System Settings > Privacy & Security > Accessibility. c. Find Rephlo in the list and toggle it ON. d. Return to the Rephlo dialog and click "Check Again".
-
Screen Recording Permission a. Click "Open ›" next to Screen Recording. b. macOS opens System Settings > Privacy & Security > Screen Recording. c. Find Rephlo in the list and toggle it ON. d. Return to the Rephlo dialog and click "Check Again".
-
Restart the app. Some permission changes on macOS require a full restart of the application to take effect. Quit Rephlo completely and relaunch it from
/Applications.
Tip: If Rephlo does not appear in the permission lists, try launching the app once, then check again. macOS adds apps to the permission list after they first attempt to use the protected feature.
Warning: If you skip granting permissions, Rephlo will still launch and function for manual commands via the dashboard, but global hotkeys and screenshot capture will not work.
First Launch Configuration
When you first open Rephlo, the Welcome Screen appears with the heading "Welcome to Rephlo — Choose how you'd like to get started." It presents two cards plus a skip link.
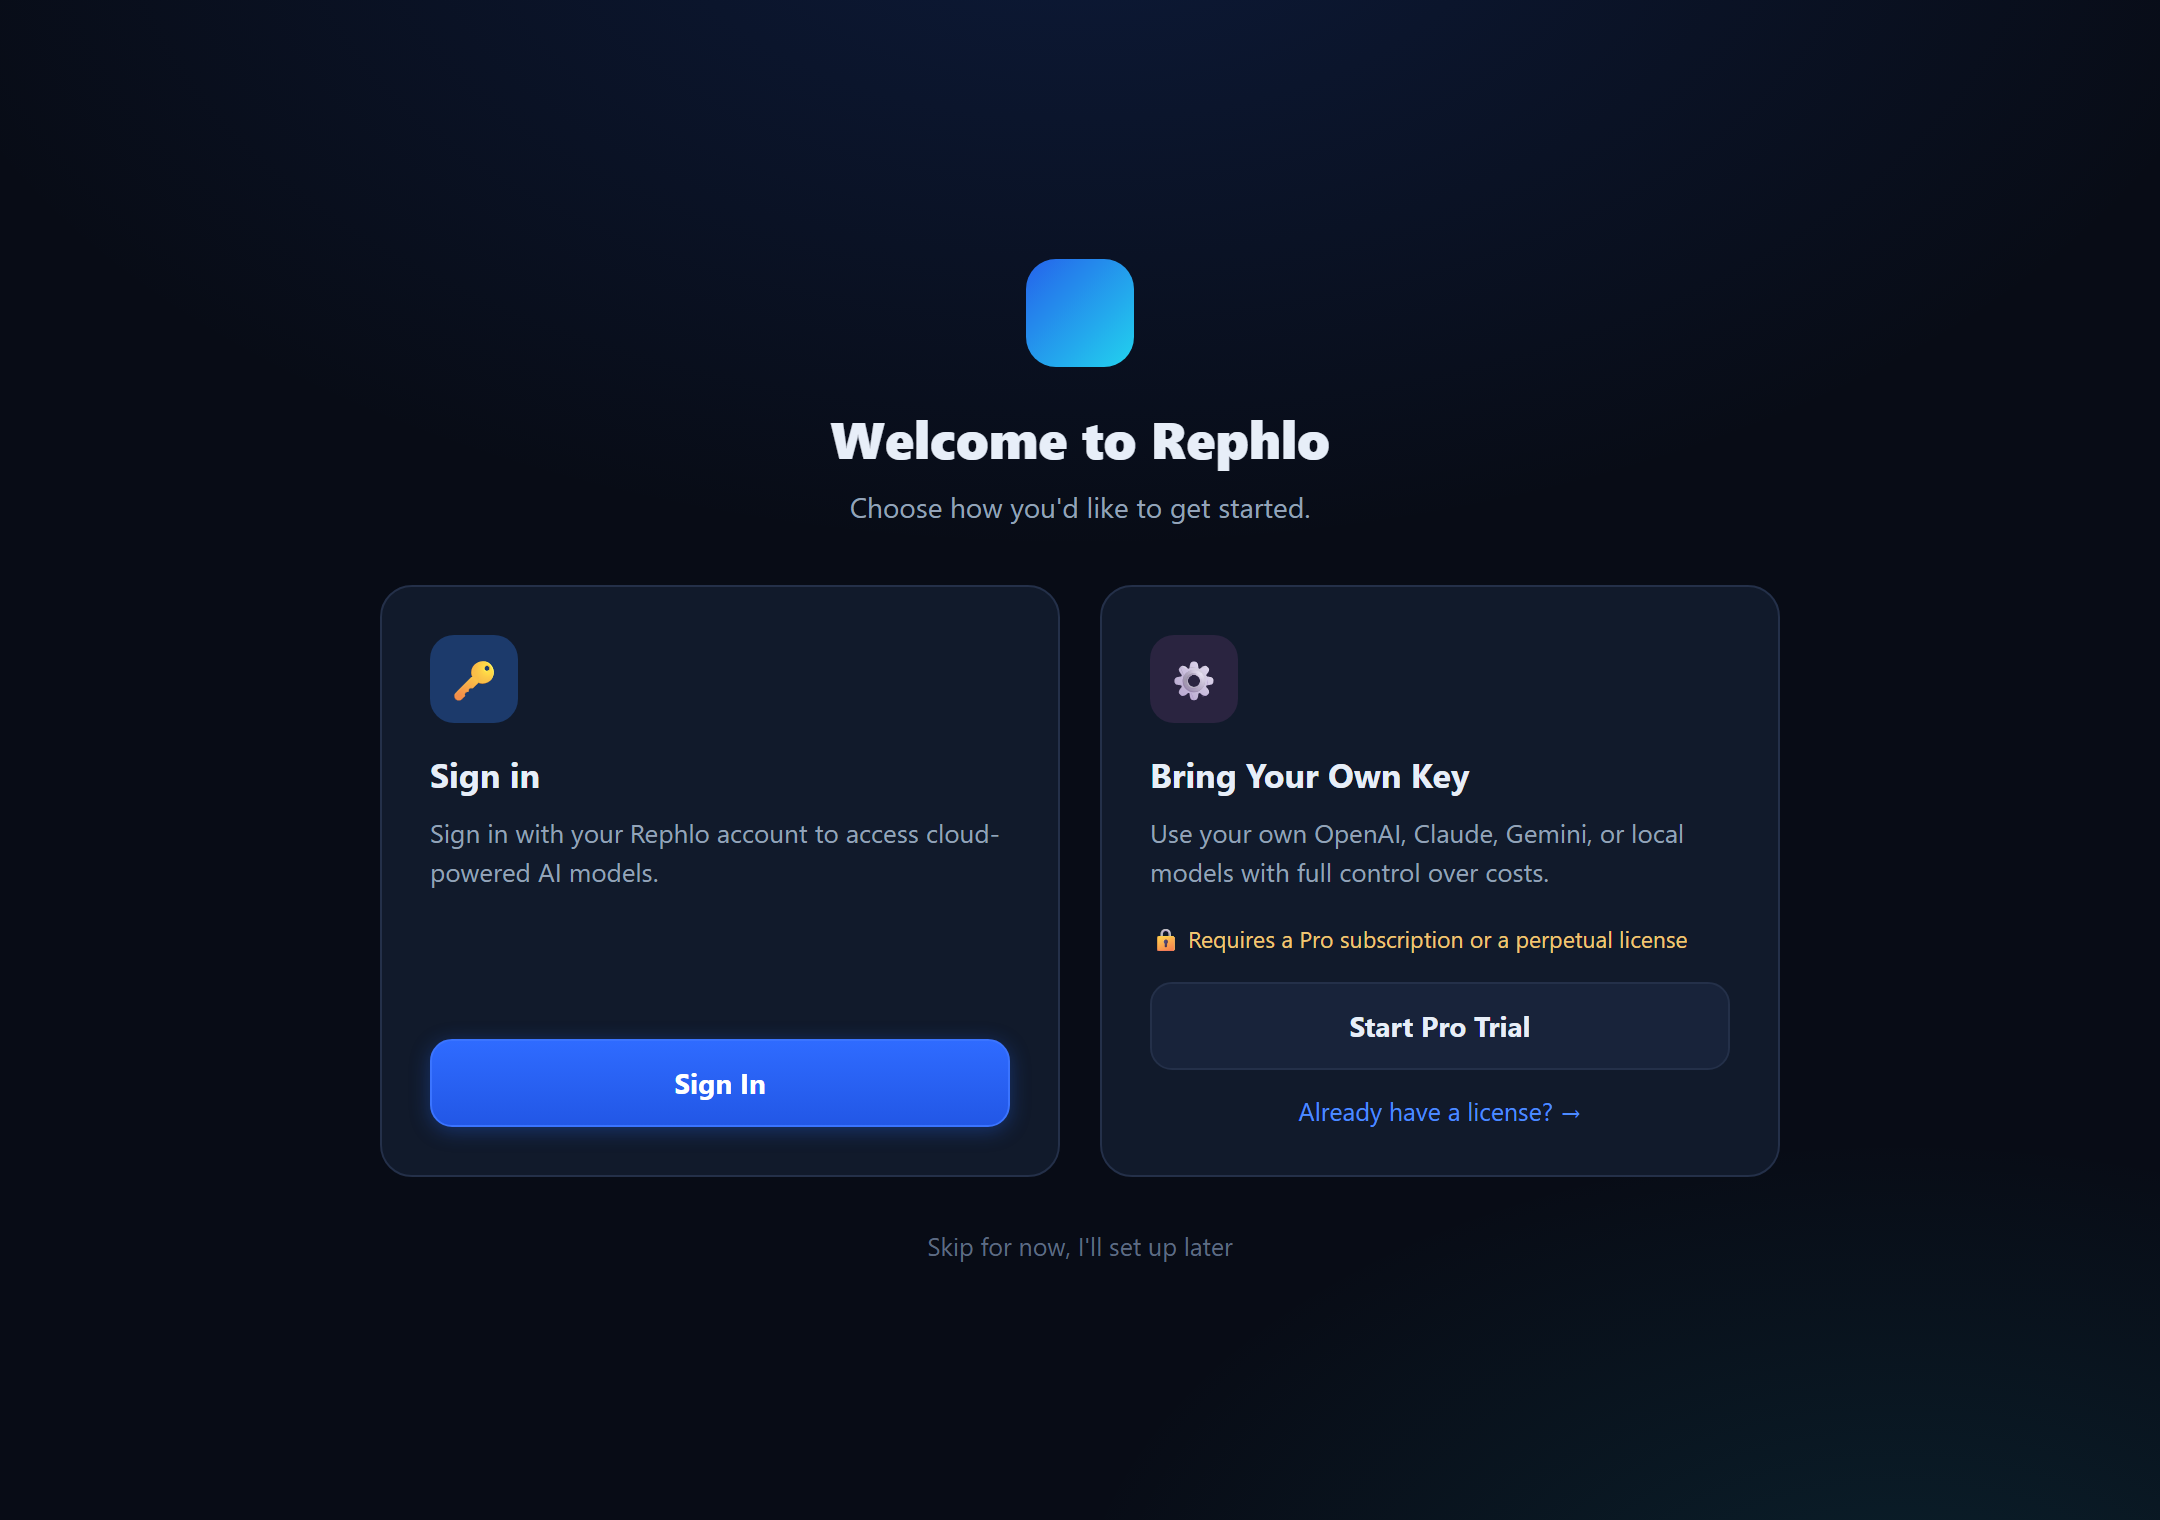
The Welcome Screen shows two side-by-side cards. The left card, "Sign in" (key icon), reads "Sign in with your Rephlo account to access cloud-powered AI models" with a Sign In button. The right card, "Bring Your Own Key" (gear icon), reads "Use your own OpenAI, Claude, Gemini, or local models with full control over costs," notes "🔒 Requires a Pro subscription or a perpetual license," and has a Start Pro Trial button plus an "Already have a license? →" link. At the bottom is a "Skip for now, I'll set up later" link.
Sign in (Dedicated API)
Best for users who want managed access without their own API keys. Click Sign In to open your browser and authenticate with your Rephlo account. On success, Rephlo automatically creates and activates a Dedicated API provider using your account's preferred model (or a sensible default if none is set). You can create a Rephlo account on the web platform.
Bring Your Own Key (BYOK)
Best for users who already have accounts with AI providers and want to use their own keys. BYOK is unlocked by a Pro subscription or a perpetual license:
- Click Start Pro Trial to open the plans page and sign in—your trial is activated after authentication.
- Or click "Already have a license? →" to jump straight to Settings > License and paste an existing perpetual-license key.
Once unlocked, add your keys in Settings > LLM Providers: pick a provider (OpenAI, Anthropic, Google, Groq, xAI, OpenRouter, Azure OpenAI, or OpenAI-Compatible), paste your API key, click Test Connection, then Save. See Managing Providers for full details.
Skip for now
Choose "Skip for now, I'll set up later" to explore the dashboard, browse commands, and configure settings without a provider. Commands you create are saved locally; execution is deferred until you configure a provider. You can set one up anytime in Settings > LLM Providers.
For Ollama (local/offline): Ensure Ollama is installed and running. In Rephlo Settings > LLM Providers, select Ollama, enter the endpoint URL (default:
http://localhost:11434), and choose a model from the dropdown. For models that run entirely inside Rephlo with no separate install, see On-Device Models.
Verifying Installation
Look for the Rephlo icon in your system tray (Windows) or menu bar (macOS).
| Platform | Where to Look |
|---|---|
| Windows | System tray area near the clock (bottom-right of the taskbar). Click the up-arrow if hidden. |
| macOS | Menu bar at the top-right of the screen, next to the system icons. |
The tray icon has two visual states, plus a paused indicator surfaced through its tooltip:
- Ready — the normal icon. Rephlo is running and listening for hotkeys.
- Processing — the icon gently blinks while an AI request is in progress, then returns to normal.
- Paused — when hotkey detection is paused, the tooltip reads "Rephlo - AI Text Assistant (Paused)".
Tray icon actions:
- Left-click the icon to show the Rephlo window (Dashboard).
- Right-click to open the tray menu, which contains Show Rephlo and Exit.
App-Wide Zoom
Rephlo supports zooming the entire interface for accessibility:
| Action | Windows | macOS |
|---|---|---|
| Zoom in | Ctrl + + | Cmd + + |
| Zoom out | Ctrl + - | Cmd + - |
| Reset zoom | Ctrl + 0 | Cmd + 0 |
Data Storage Locations
| Platform | Data Directory | Database File |
|---|---|---|
| Windows | %APPDATA%\Rephlo\ | rephlo.db |
| macOS | ~/Library/Application Support/Rephlo/ | rephlo.db |
Next Step: Let's run your first command in the First Use Walkthrough.