Basic Configuration
Adjust Rephlo to fit how you work. Open Settings from Right-Click Tray Icon → Settings or the Gear Icon on the Dashboard.
This page covers the everyday tabs — General and Hotkeys. Several other tabs have their own pages: Providers, Connectors, RAG Retrieval, Privacy & Data, Account, Billing & Subscription, and License & Trial. Power-user options live in Advanced Configuration.
Settings Tabs Overview
The Settings panel is organized into tabs. Some are shown only in certain modes or builds:
| Tab | Purpose | Visibility |
|---|---|---|
| General | Theme, startup, context-menu overlay behavior, token budget | Always |
| LLM Providers | Provider API keys, models, and per-model settings | Always |
| Connectors | MCP integrations (Notion, GitHub, Slack, etc.) | When the connectors feature is enabled for you |
| Hotkeys | Global shortcuts and the text-selection trigger | Always |
| License | License status, activation, and trial | Always |
| Billing | Subscription and payment | Login mode (org owners) |
| Usage | Token usage, cache analytics, cost tracking | Login mode |
| Privacy | History retention, data export, PII redaction | Always |
| Account | Account info, or BYOK-mode indicator | Always |
| Environment | API endpoint switching | Debug builds only — not visible to regular users |
| About | Version, credits, support links | Always |
Note: The Billing and Usage tabs appear only when you are signed in (Dedicated API / login mode). They do not appear for BYOK (Bring Your Own Key) users.
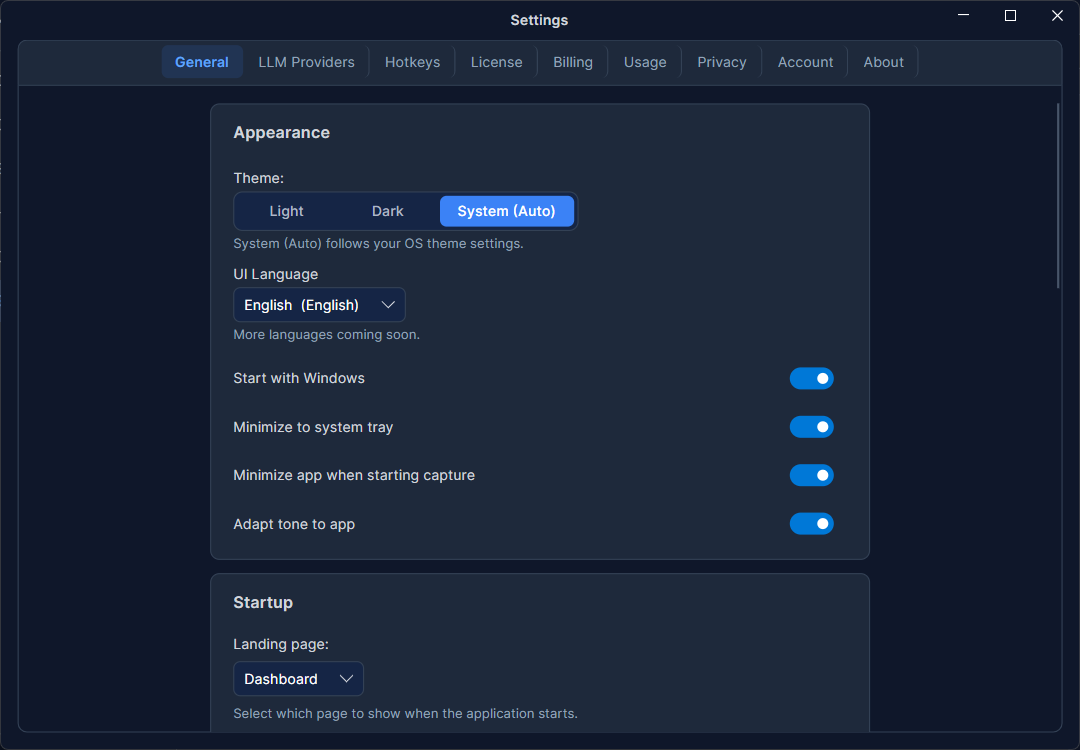
General Settings
- Theme — choose Light, Dark, or System (follows your OS theme and updates live when the OS theme changes).
- Start with OS — launch Rephlo automatically when you log in. (Labeled "Open at Login" on macOS, "Start with Windows" on Windows.)
- Minimize to tray — closing or minimizing the main window sends Rephlo to the system tray instead of the taskbar. On by default.
- Minimize on capture — automatically minimize the main window when you start a screenshot capture, so the window does not overlap the capture area. On by default. (This behavior is most relevant on macOS; the toggle is visible on all platforms but may have no effect on Windows/Linux.)
- Landing page — pick which screen Rephlo opens to: Dashboard, Commands, Spaces, History, or Chat.
Context Menu Behavior
These settings control the command overlay that appears when you trigger Rephlo on selected text:
- Show clipboard preview — when enabled, a preview dialog appears before a command runs so you can review the captured text and confirm. When disabled (the faster default), commands run immediately.
- Display preset — how much detail the overlay shows:
- Minimal — command names only.
- Compact — names with brief descriptions.
- Balanced — names, descriptions, and group labels (default).
- Full — all details, including execution mode and token estimates.
- Max favorites shown — how many favorite commands appear in the overlay (default 5). The favorite/other limits apply only to the Compact and Balanced presets — Full shows everything and Minimal has nothing to limit.
- Max other commands shown — how many non-favorite commands appear below the favorites.
Default Space Token Budget
Sets the default token limit for newly created Spaces — how much document content a new Space can hold before compaction becomes relevant. The slider ranges from 5,000 to 1,000,000 tokens (the input box accepts down to 1,000); the default is 100,000. This applies to new Spaces only — you can change the budget for any individual Space later, and changing this setting does not affect existing Spaces.
Hotkeys
Global hotkeys let you trigger Rephlo from any application on your desktop. Two are configurable:
- Context Menu (Command Overlay) — opens the command overlay with your selected text.
- Screenshot Capture — captures a screen region for Vision commands.
Default hotkeys differ by platform and are chosen to avoid common system shortcuts. All hotkeys are fully customizable.
| Action | macOS | Windows / Linux |
|---|---|---|
| Context Menu Overlay | Shift + Cmd + C | Ctrl + Shift + Alt + C |
| Screenshot Capture | Shift + Cmd + S | Ctrl + Shift + Alt + S |
The Hotkeys tab also includes:
- Enable global hotkeys — master toggle for all global shortcuts.
- Show hotkey hints — display the configured shortcut as a hint in the UI.
- A Change control for each hotkey to record a new combination, and a Test Overlay button.
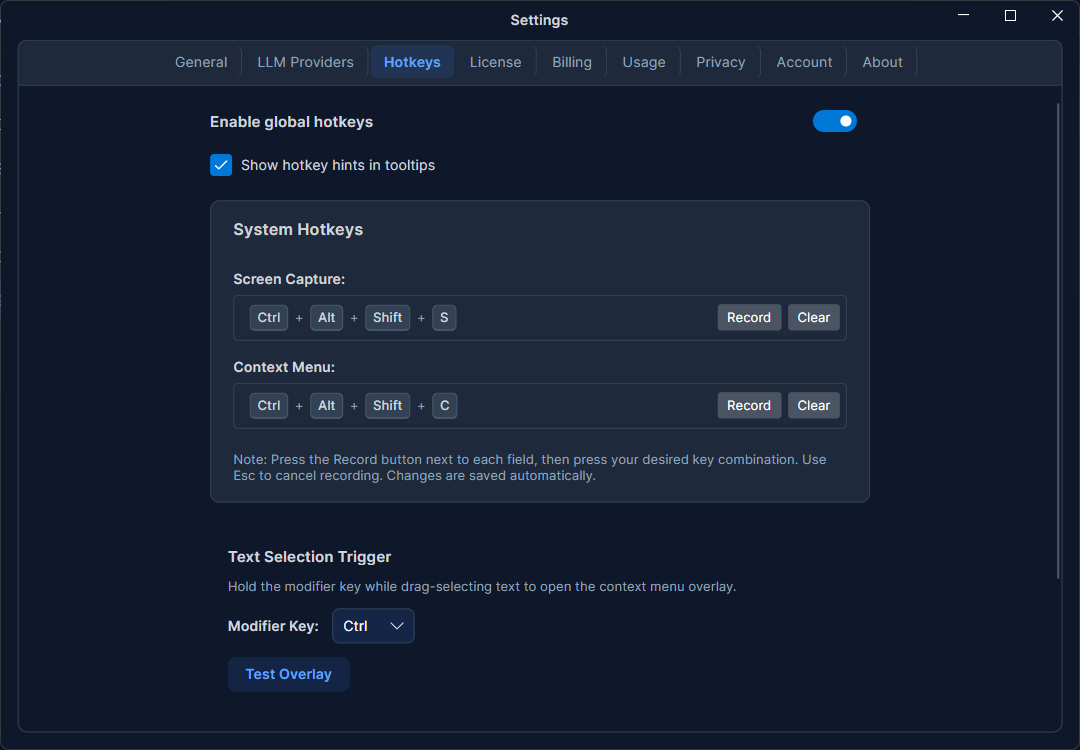
Text Selection Trigger
Instead of pressing a hotkey, you can open the command overlay by drag-selecting text while holding a modifier key — a faster alternative for in-place editing:
- Hold the configured modifier key (default: Cmd on macOS, Ctrl on Windows/Linux).
- Click and drag to select text in any application.
- Release the mouse — the overlay appears automatically with the selected text.
You can change the modifier to Cmd/Command, Option/Alt, Control/Ctrl, or Shift (the available choices and labels adapt to your platform). The change applies immediately, with no restart required.
Test Overlay
Click Test Overlay to open the command overlay without selecting any text first. This is a quick way to confirm your overlay and command configuration look the way you expect.
Related Settings Pages
The remaining settings tabs are documented separately:
- Providers — add API keys, pick models, and set per-model temperature, max tokens, and context window. See also Managing Providers.
- Connectors — connect external tools over MCP.
- Privacy & Data — history retention, data export, and PII redaction.
- Account — your account details or BYOK-mode indicator.
- Billing & Subscription — plan, payment, and invoices. Pricing lives at rephlo.app/pricing.
- License & Trial — license status, activation, trial, and device ID.
- Advanced Configuration — caching, compaction, and developer tools.
Next: Power users can explore Advanced Configuration.